Water always finds the path of least resistance, and on an exterior entryway, that path almost always terminates at the bottom few inches of your door casing. Exterior brickmould—the thick, profiled trim framing the exterior perimeter of a pre-hung door—acts as the primary bridge between the door unit and your home’s exterior cladding. Because it sits directly exposed to rain, wind-driven snow, and splashback from concrete stoops, the bottom corners of traditional wood brickmould are notorious for rotting out long before the rest of the entryway fails.
Catching and repairing this decay early is crucial. Left unaddressed, trapped moisture wicks upward into the vertical door jambs, penetrates the subfloor, and eventually compromises the framing studs inside the rough wall opening. Replacing a rotted section or an entire leg of brickmould is one of the most cost-effective exterior home repairs you can make, restoring both curb appeal and the home’s weather barrier in an afternoon.
Assessing the Extent of the Damage
Before purchasing replacement materials, determine how deep the decay actually runs. Wood rot often hides beneath a skin of flexible exterior paint that looks sound until pressure is applied.
Take a flathead screwdriver or an awl and press firmly into the bottom six inches of the brickmould, paying close attention where the casing meets the door sill. If the tool sinks into spongy wood with minimal effort, the lumber has rotted. Next, check the surrounding components. Probe the door jamb directly behind the brickmould, the sill horns extending beneath the trim, and the bottom of the rough framing if it is visible.
If the jamb behind the brickmould is firm and undamaged, you only need to replace the trim itself. While some homeowners opt for a partial “Dutchman” patch—cutting out only the bottom four to six inches of the rotted moulding—a full-length replacement of the vertical leg is far more durable. Splicing in a short patch introduces a horizontal seam mid-run, creating a new entry point where water can penetrate and restart the rot cycle a few seasons down the road.
Choosing the Right Replacement Material
Original exterior trim on older homes is typically finger-jointed pine or fir. While economical, untreated finger-jointed pine absorbs moisture like a sponge once caulking cracks. When selecting replacement material, you have two primary options.
Cellular PVC Moulding
Cellular PVC is the modern gold standard for exterior door trim. It matches the exact profile (standard WM180) of traditional wood brickmould, cuts and nails with standard woodworking tools, and is completely impervious to moisture, insects, and rot. It will never absorb standing water from a wet sill. PVC expands and contracts slightly with temperature changes, but when properly fastened and sealed with acrylic latex paint, it provides a permanent solution.
Rot-Resistant Wood
If you live in a historic district or prefer traditional lumber, skip finger-jointed pine entirely. Opt instead for clear cedar, redwood, or preservative-treated pine. If you use solid wood, you must thoroughly seal every face, including the hidden back side and the cut end grains, with an exterior oil-based primer before installation. Unsealed end grain acts like a bundle of drinking straws, drawing moisture upward from the sill through capillary action.
Removing the Damaged Brickmould Cleanly
Careless removal can damage your house wrap, tear adjacent siding, or crack delicate interior drywall from heavy prying against the jamb. Take a methodical approach to extracting the old piece.
Begin by running a sharp utility knife along both edges of the rotted brickmould. Slice completely through the bead of sealant connecting the trim to the exterior siding or masonry, as well as the inner bead connecting the trim to the door jamb. Scoring these joints prevents the old caulk from pulling away chunks of paint, stucco, or siding as the moulding comes off.
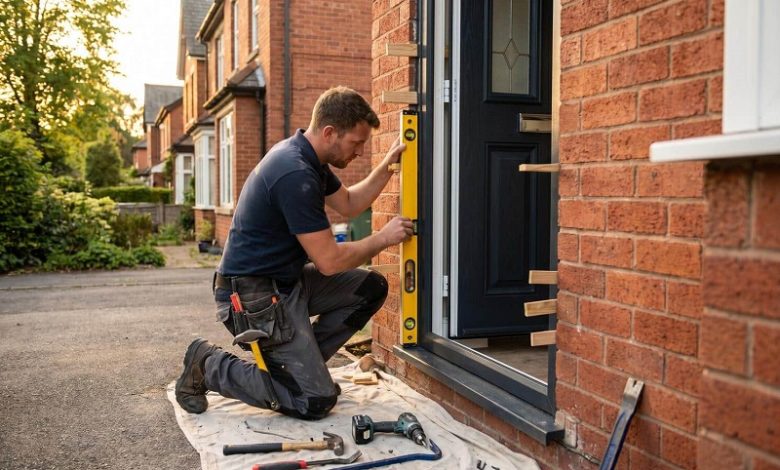
Insert a stiff putty knife or a small pry bar into the seam between the door jamb and the brickmould near the bottom. Slide a flat block of scrap wood behind your pry bar to protect the exterior siding or brick from being dented by leverage. Gently lever the trim outward until the finish nails begin to back out. Work your way progressively up the jamb toward the top corner.
At the top mitered corner, proceed with extra care. The horizontal head brickmould will remain in place, and you want to avoid snapping its 45-degree mitered tip. Once the vertical leg is free, use pliers to pull any remaining nails straight through the jamb or framing rather than hammering them flat, which leaves an uneven mounting surface. Scrape away all residual caulk and dirt until the mounting flange and jamb face are clean and smooth.
Measuring, Cutting, and Dry-Fitting the New Trim
Achieving a watertight fit requires precise angles at both the top and bottom of the new piece.
First, check the top miter. Exterior brickmould joints meet at a 45-degree angle. Set your miter saw to 45 degrees and make a clean cut on the top end of your replacement stock.
Next, measure the length down to the door sill. Most exterior door sills slope downward away from the house at an angle between 7 and 15 degrees to shed water. If you cut the bottom of your brickmould flat at 90 degrees, only the back heel of the trim will touch the sill, leaving an unsightly triangular gap at the front. Set your saw’s bevel to match the slope of your sill—an angle gauge or bevel square makes short work of finding this pitch—and trim the bottom edge so it sits flush along the entire run of the sill.
Hold the piece up against the door frame for a dry fit. Check the reveal—the small, consistent setback (typically 3/16 inch or 1/4 inch) between the edge of the brickmould and the inner face of the door jamb. Ensure the top miter closes tightly without forcing the head piece upward.
Fastening and Weatherproofing the Installation
A long-lasting repair relies as much on proper sealing as it does on mechanical fasteners.
Before placing the piece permanently, inspect the gap between the door jamb and the wall framing. If the existing flashing tape has deteriorated, apply a fresh strip of self-adhering flashing tape over the rough opening seam. If you are using wood brickmould, coat the freshly cut bottom bevel generously with an exterior primer or end-grain sealer and let it dry.
Run a continuous, heavy bead of exterior-grade polyurethane or elastomeric sealant along the back side of the brickmould where it will contact the wall sheathing. Apply a dab of exterior wood glue or PVC cement directly to the top 45-degree miter joint.
Press the new trim into position, aligning your reveal along the jamb. Secure the brickmould using 2-1/2-inch to 3-inch hot-dipped galvanized or stainless steel finish nails. Drive nails in pairs spaced every 12 to 16 inches along the height of the trim: one nail angled slightly inward into the door jamb, and the second driven straight through the thicker outer edge into the structural 2×4 framing behind the casing. Countersink the nail heads roughly 1/8 inch below the surface using a nail set.
Caulking and Finishing
Wipe away any sealant that squeezed out during fastening using mineral spirits or a rag dampened with water, depending on the caulk base.
Fill the countersunk nail holes with an exterior-grade, non-shrinking vinyl spackle or dedicated exterior wood filler. Once cured, sand the patches flush using 120-grit sandpaper.
Apply a smooth, consistent bead of paintable elastomeric sealant along the exterior joint where the brickmould meets the siding, and along the inner seam where it meets the door jamb. Do not caulk the very bottom edge where the trim rests on the sill horn; leaving this microscopic interface unsealed allows any incidental moisture that gets behind the casing to drain freely outward rather than trapping it against the wood.
Finish the repair by applying two coats of high-quality exterior acrylic latex paint over the entire leg, blending it into the existing head trim. The new piece will be virtually indistinguishable from the rest of the entryway while providing decades of reliable protection against the elements.