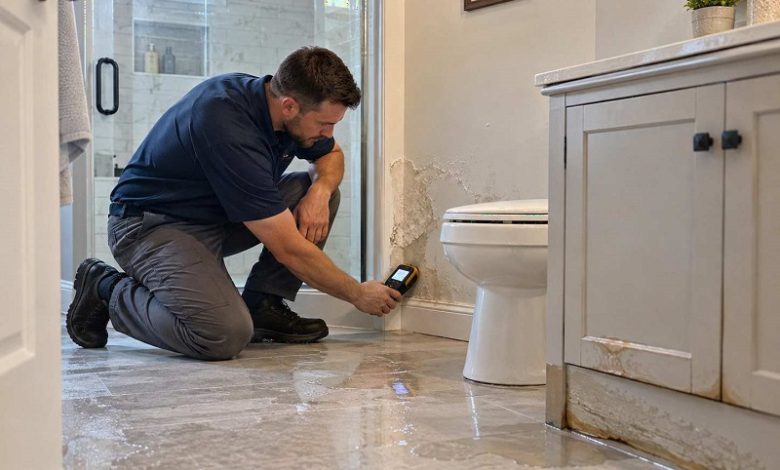
A catastrophic bathroom leak rarely announces itself with a dramatic burst pipe. More often, water damage is a slow, quiet saboteur. It begins with a pinhole gap in a silicone bead, an imperceptible hairline crack in a shower grout line, or a toilet wax ring that lost its seal months ago. Because water follows the path of least resistance, moisture can travel along joists, pool under subflooring, and rot wall studs long before you ever see a discolored patch on the ceiling below.
Remediating subfloor rot, structural framing damage, and toxic mold remediation can easily cost thousands of dollars. The good news is that nearly all bathroom water damage is entirely preventable. With a proactive maintenance routine and an understanding of where moisture tends to hide, you can safeguard your home against costly structural repairs.
Fortify Your Grout and Caulking
The tile and fixtures in your bathroom are waterproof, but the seams between them are not. Caulk and grout act as your home’s primary defense line against intruding water, yet both degrade over time due to building settlement, temperature swings, and chemical cleaners.
Silicone caulk around the perimeter of your bathtub, shower pan, and vanity backsplash should be pliable and smooth. When caulk begins to dry out, shrink, peel, or turn yellow, water seeps directly behind the walls. Never apply fresh caulk directly over old, deteriorating caulk. To maintain a true watertight barrier, scrape away the degraded material completely, clean the joint with rubbing alcohol to remove soap scum and mildew residue, let it dry thoroughly, and apply a premium 100% silicone sealant formulated for kitchen and bath applications.
Grout requires equal attention. Cementitious grout is naturally porous, meaning standing water can soak straight through it and saturate the backer board behind your tiles. Inspect your shower walls and floor every few months for missing chunks, crumbling sections, or hairline fractures. Furthermore, apply a penetrating grout sealer once every year or two. This invisible barrier causes water droplets to bead on the surface rather than soaking into the substrate.
Eliminate Hidden Supply and Drain Leaks
Plumbing fixtures contain numerous pressurized joints and friction fittings that can loosen or degrade without obvious warning signs. A thorough inspection under sinks and behind appliances should be part of your seasonal home maintenance.
Upgrade Vulnerable Supply Lines
Take a close look at the flexible supply tubes feeding your sink faucets and toilet tank. If you still have rigid plastic or plain rubber hoses, replace them immediately with braided stainless steel supply lines. Plastic hoses become brittle over time and are notorious for sudden ruptures that flood bathrooms in minutes. Stainless steel lines cost only a few dollars more and provide significantly higher burst resistance.
Inspect the Vanity Cabinet Base
Water leaks inside vanity cabinets often go unnoticed because spare towels, toilet paper, and cleaning supplies conceal the damage. Empty out the cabinet under your sink every few months and examine the P-trap, shut-off valves, and drain tailpiece while running the water. Look for greenish mineral deposits around threaded connections, which indicate a slow, evaporating weep. If the baseboard inside the cabinet feels warped, damp, or soft, you have an active drip that demands immediate repair.
Check the Toilet Base for Instability
A toilet should sit completely rigid against the floor. Gently straddle the bowl and try to rock it from side to side. If the fixture shifts even a fraction of an inch, the wax ring beneath the porcelain has likely been crushed or broken. Once a wax ring loses its compression seal, wastewater seeps onto the subfloor every time the toilet flushes. If your toilet wobbles, pull the fixture, inspect the subfloor for moisture, install a new wax or rubber seal, and shim the base before tightening the closet bolts.
Manage Humidity and Ambient Moisture
Not all water damage comes from plumbing leaks. High relative humidity and steam from daily showers can saturate drywall, peel paint, and cultivate wood-rotting mold inside wall cavities.
Your exhaust fan is the most critical mechanical component in preventing moisture accumulation. Ensure your fan is properly sized for the room; as a baseline, a bathroom fan should move at least one cubic foot of air per minute (CFM) per square foot of room area for spaces under 100 square feet.
Habits matter just as much as hardware:
-
Turn the exhaust fan on before turning on the shower, not halfway through.
-
Run the fan for at least twenty minutes after finishing your shower to clear residual condensation from walls, mirrors, and ceilings.
-
Consider replacing standard toggle switches with a digital timer switch or a humidity-sensing switch that operates automatically whenever ambient moisture spikes.
-
Wipe down condensation on cold exterior walls and window glass during winter months.
If your bathroom lacks a dedicated exhaust fan, crack a window during showers and run a freestanding dehumidifier to keep indoor humidity levels consistently below 50 percent.
Protect the Floor from Standing Water
Bathroom flooring is designed to handle splashes, but it cannot withstand standing puddles for prolonged periods. Water that sits on top of tile seams or luxury vinyl planks eventually finds its way to the perimeter edges where baseboards meet the floor.
Make sure your shower door sweeps and magnetic gaskets create a firm seal against the frame when closed. If you use a traditional shower curtain, always use a weighted fabric or vinyl liner kept strictly inside the tub ledge. Outside the tub or shower entrance, use thick, absorbent bath mats with non-slip backings. Hang mats up to dry after heavy use rather than leaving damp textiles lying flat against the floor, which traps moisture against the finish and promotes subfloor decay.
Implement Smart Early Warning Systems
Even the most diligent homeowners cannot monitor every pipe joint twenty-four hours a day. Modern smart home technology provides an affordable safety net against major catastrophic floods.
Place compact, battery-operated smart water leak sensors in high-risk blind spots: directly behind the base of the toilet, inside the vanity cabinet beneath the drain trap, and adjacent to the access panel for your shower valve. These devices connect to your Wi-Fi network and deliver an immediate alert to your smartphone the instant water bridges their metal contacts. Catching an overflowing toilet or a pinhole line failure within two minutes rather than eight hours can be the difference between a simple towel cleanup and a complete tear-out renovation.
Make sure everyone in your household knows the exact location of the individual fixture shut-off valves and the primary water shut-off valve for the home. Testing these valves once a year ensures they turn freely and will not seize when you need to stop a plumbing leak in an emergency.